File System structure
Editing Basics
Hex/DC examples
RevEngEd 2
|

Changing a texture without changing the filename length is a very simple operation. I now assume you are familiar with the mission folder and mpmaplist.txt, and in this example I'm working on a moddable "NORMANDY2_MP_ZONE_NEW" put inside the "Mission" Folder.
Let's open map.4ds from Normandy2_Mp_Zone_New with the hex editor: image. In the first part of the file you can notice several strings, ending with .BMP or .TGA (MAPA_N2_1.BMP, X_BLUE.TGA, X_FLGALL.TGA, X_NMZSED.TGA, X_BLACK.TGA, X_FLGAXS.TGA, etc.): those are all filenames referring to images used as textures. In particular, MAPA_N2_1.BMP is the image used as background in the in-game map, and you can find this file also in the extracted "MAPS" directory.
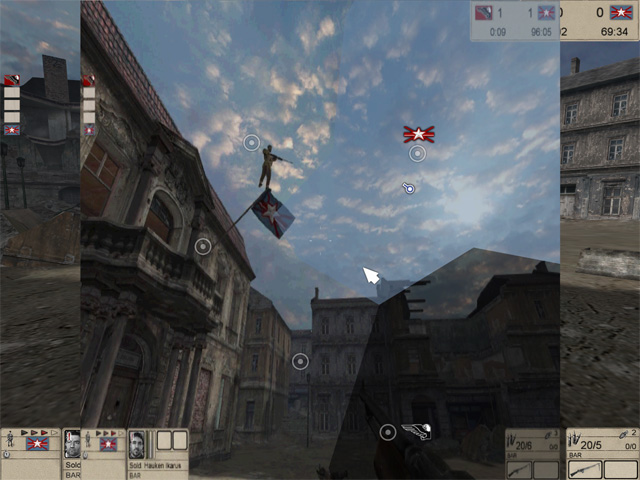
Take or create a new image and save it as MAPA_N2_1.BMP* inside the MAPS directory inside the H&D2 main dir. Enter in game, in the new Normandy2 you are modding, and hold "M". The background map is now the .BMP created: image. What's happened? Before creating the new image, H&D2 searches in "MAPS" directory for MAPA_N2_1.BMP, does not find it, so loads it from MAPS.DTA. After creating a new MAPA_N2_1.BMP inside the "MAPS" directory, H&D2 searches for MAPA_N2_1.BMP in the "MAPS" directory, do finds it, so loads from the directory.
Notice that it's not necessary to maintain the same resolution of the original. In this example, the original MAPA_N2_1.BMP was 512x512 pixels, whilst the new one I've created is 1280x960 pixels.
Notice also that a rectangular texture placed over a square polygon is automatically re-shaped.
Finally, notice that now, all the Normandy2 missions (single player, the original occupation, this new mission, other ones eventually created...) will show the new image as map background. What if I want a new texture for just the very Normandy2_Mp_Zone_New? Let's see...
Return to map.4ds opened with hex editor and change the MAPA_N2_1.BMP string with an equally long name of your choice. Take care of using the very same number of letters and do not touch other bytes. In this example, I've inserted the filename "HX01_EXMP.BMP", which is also 13 letters: image. Now take the previously created MAPA_N2_1.BMP and rename it HX01_EXMP.BMP.BMP, like I've done: image.
Now, only Normandy2_Mp_Zone_New has the new texture as in-game map background. Changing other textures is similar, and you only have to discover how they're named inside the several .4DS files, which can be huge.
* I don't know if H&D2 can read every format of .BMP: I always choose the lowest bit version: image. |
|


